How to Run Your Dev and Production iOS Apps Side by Side
6 min read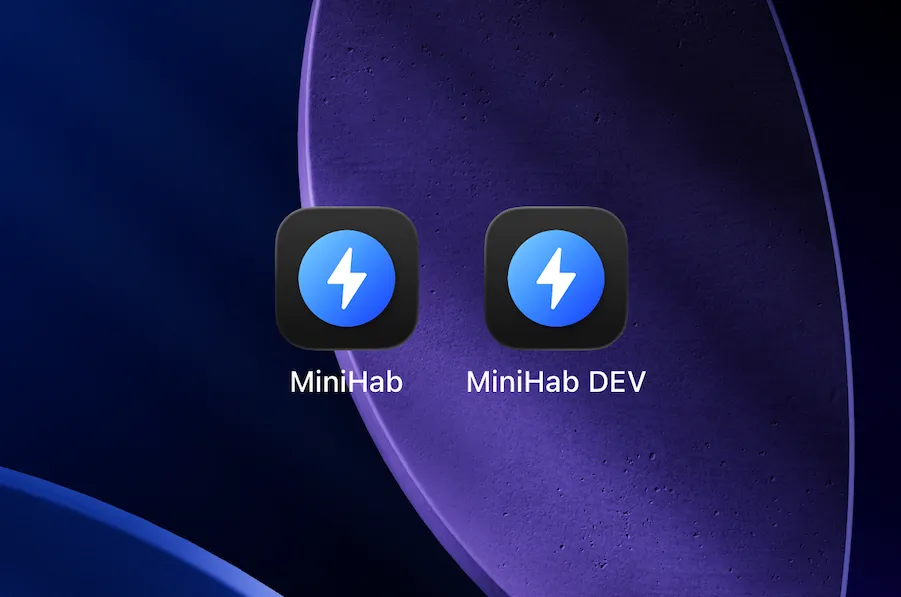
Note: If you want to view the images in this post in their original resolution, you can click on them.
The Problem
If you’re an iOS developer working on an app that uses SwiftData or CoreData with CloudKit, you should know that CloudKit containers have two separate environments: Development and Production. Xcode-installed builds (signed with a development profile) sync against the Development environment, while TestFlight and App Store builds sync against Production.
These environments have completely separate data. The problem arises when you install the app from Xcode (overwriting the PROD copy of the app you already had installed). The local data from Production is still on disk, but CloudKit now pulls the Development data down, and merges the two locally. This doesn’t break anything in PROD, but your local copy of the app now has merged data (Production data remains untouched, but the local data gets mixed).
Before You Begin
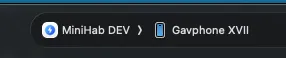
If you already have an app that uses SwiftData/CoreData + CloudKit and you’ve got a local copy, delete it and re-download from TestFlight or the App Store. Once we’ve finished implementing these changes you will be able to install a new DEV copy from Xcode. In order to test the PROD app, you can download from the App store. In order to test the DEV app, you will select the <App Name> DEV scheme as seen here, and then compile to your device.
The Solution & How to Implement It
Alright before we begin, what we are going to do here is set up a separate build configuration with a different bundle ID. I will break this down into easy to follow tasks that you can do in order.
Step 1: Create a New Build Configuration
- Open your project in Xcode (click the project in the navigator, not a target)
- Select the Info tab
- Under Configurations, click the + button
- Choose Duplicate “Debug”
- Name it
Debug-Dev

Step 2: Set a Different Bundle ID for the DEV Config
- Select your main app target → Build Settings tab
- Search for
Product Bundle Identifier - Expand the disclosure triangle to see per-configuration values
- Change the Debug-Dev row to your bundle ID with a
.devsuffix (e.g.,com.yourteam.YourApp.dev) - Leave Debug and Release unchanged

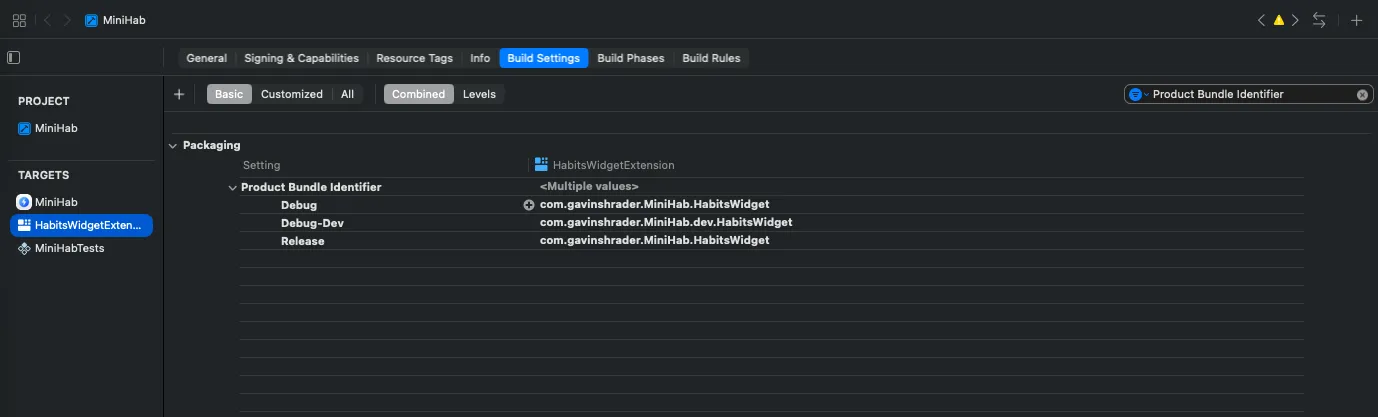
Step 3: Fix Embedded Target Bundle IDs
If you have widget extensions, test targets, or other embedded targets, you need to update their bundle IDs too.
For each embedded target, go to its Build Settings and update the Product Bundle Identifier for the Debug-Dev configuration. The bundle ID must be prefixed with the parent app’s dev bundle ID.
For example, if the parent is com.yourteam.YourApp.dev, the widget must be com.yourteam.YourApp.dev.WidgetExtension — not com.yourteam.YourApp.WidgetExtension.dev.
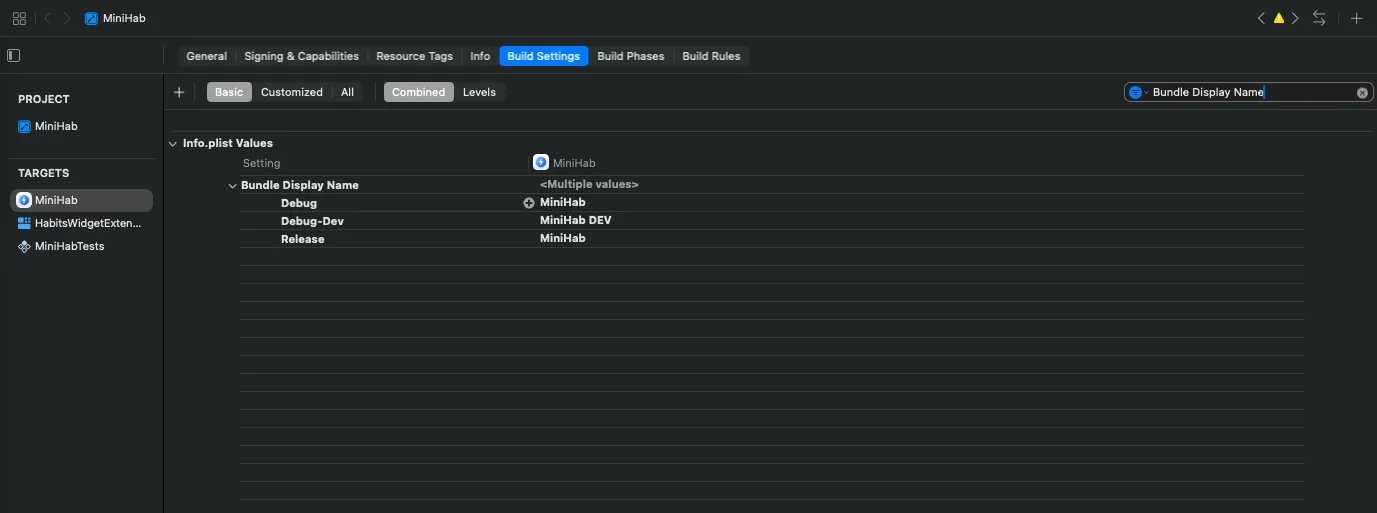
Step 4: Set a Different Display Name
- Still in the main app target’s Build Settings
- Search for
Bundle Display Name(orINFOPLIST_KEY_CFBundleDisplayName) - Set the Debug-Dev row to something like
YourApp DEV
This is the name that appears under the app icon on your home screen.
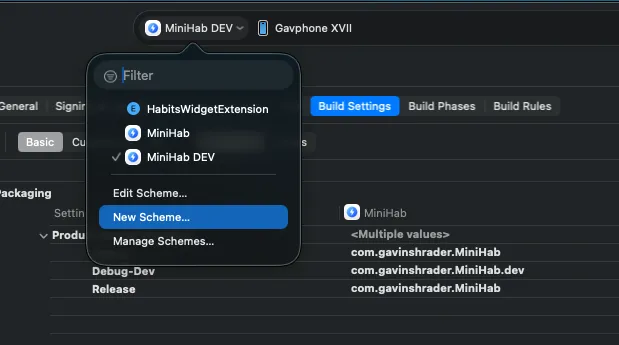
Step 5: Create a New Scheme
- Go to Product → Scheme → New Scheme (or click the scheme picker at the top center of Xcode)
- Name it
YourApp DEV
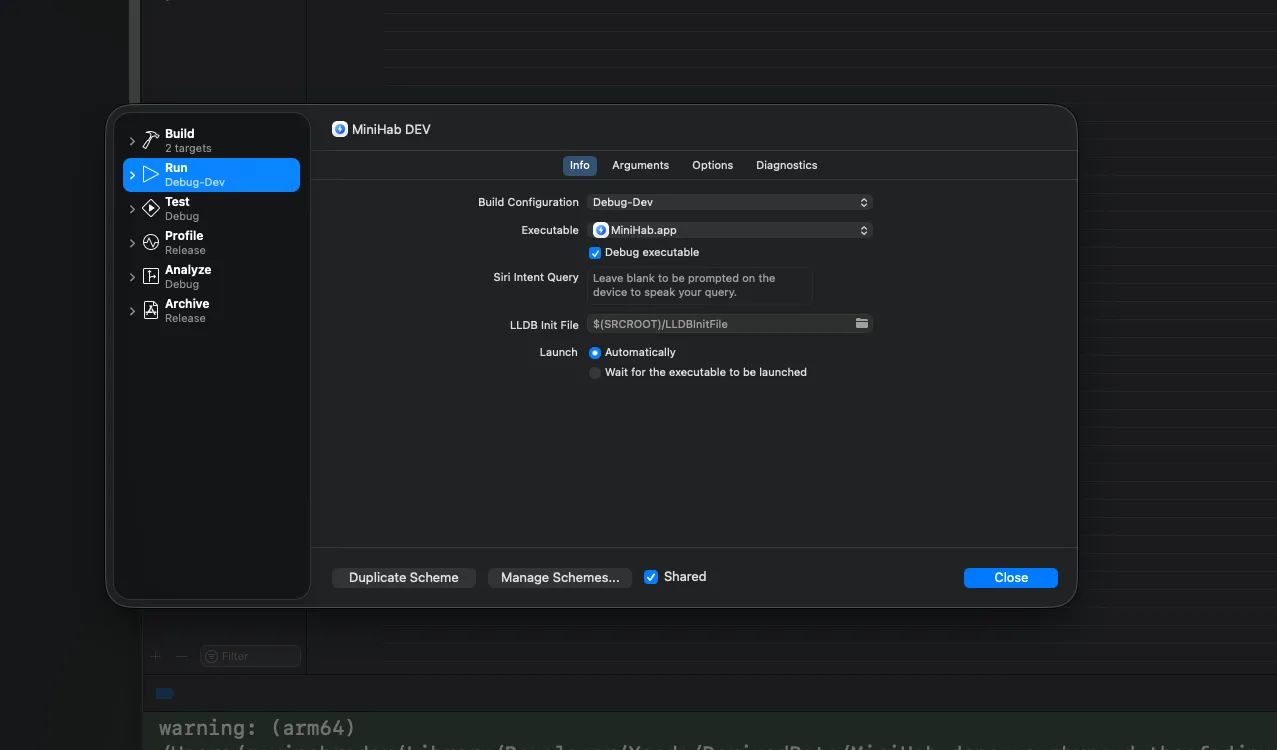
- Click Edit Scheme (or Product → Scheme → Edit Scheme)
- Under the Run action, change Build Configuration to
Debug-Dev - Leave Archive and Profile on Release, you’ll never ship from this scheme, but it keeps things clean
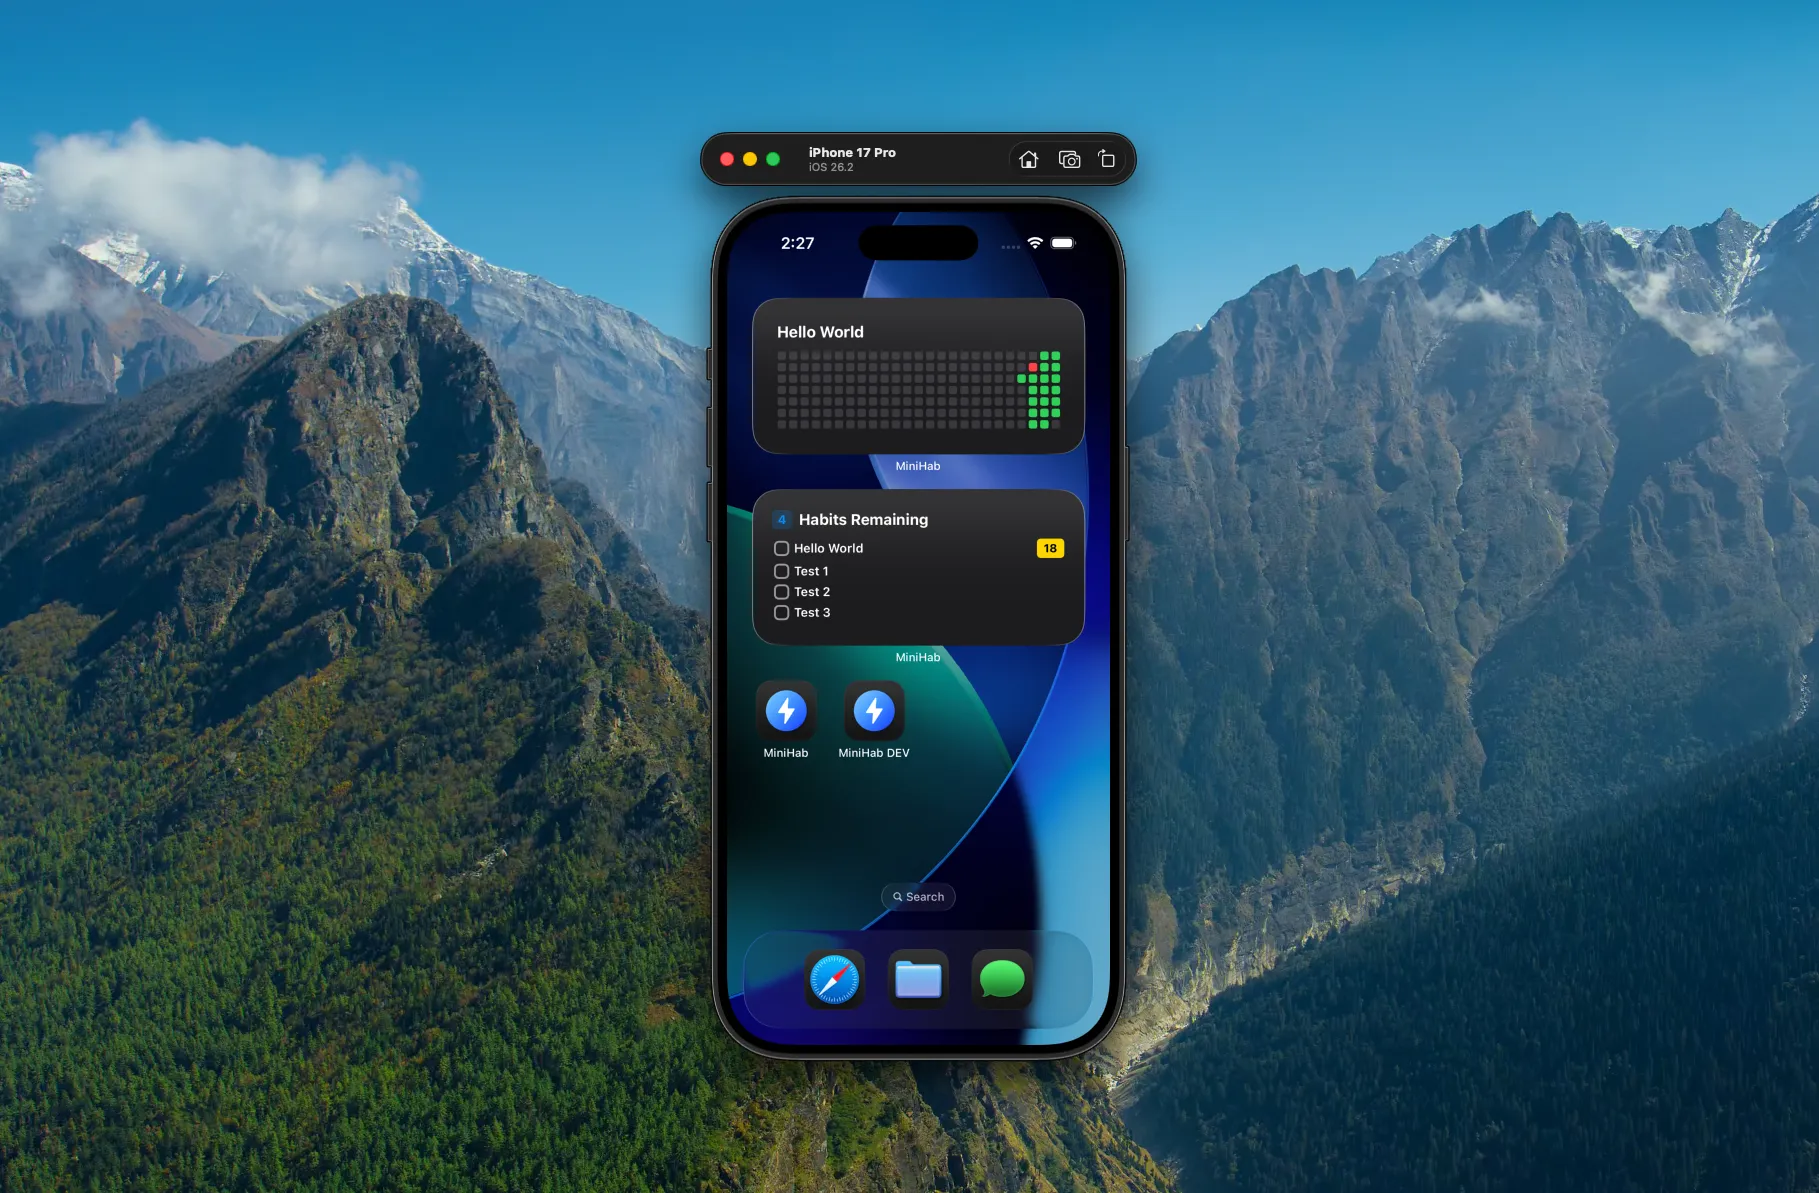
Step 6: Build and Install
- Select your new DEV scheme from the scheme picker
- Run on your device
- Xcode will auto-create the new App ID and provisioning profile (if you have Automatic Signing enabled)
- Both apps now appear on your home screen
Step 7 (Optional): Add a DEV App Icon
- Create a second app icon set in your asset catalog with a visual indicator (colored banner, “DEV” text overlay, etc.)
- In Build Settings, search for
App Iconand set the Debug-Dev config to your dev icon set - This is an optional enhancement, for this demo I kept the same icons
How Shipping Works
When you’re ready to publish, select your original scheme (not the DEV one), archive, and submit. The DEV configuration is never involved in your release pipeline. Both schemes build the exact same source code, the only difference is the bundle ID and display name.
What You Get for Free
Because the bundle ID is different, iOS treats the dev app as a completely separate app. That means a separate iCloud/CloudKit container, separate keychain, and separate UserDefaults. Your prod data is never touched during development.
One Caveat
If your app uses App Groups (e.g., for widget data sharing), the dev build still references the same App Group. Widgets will install but will show prod data, not dev data. For most development this doesn’t matter since you’re not actively changing widget data logic day-to-day, and you can continue to make UI changes to the widgets and the DEV app will show them.
The easiest way to work around this is to make a compromise and switch back to the PROD scheme to run it locally if you need to test widget logic changes. Alternatively if you want a proper future proofed solution, you can setup a new App Group for your DEV environment.
Do I Need a Fully Separate iCloud Container?
The approach in this article relies on the default container, which is auto-generated from your bundle ID (iCloud.com.yourteam.YourApp vs iCloud.com.yourteam.YourApp.dev). Because the bundle IDs are different, you get separate containers for free, no extra configuration needed.
However, if your app uses a custom/explicit container identifier in its entitlements (i.e., you hardcoded a specific container name rather than using the default), both your PROD and DEV configs will still point to the same container regardless of bundle ID. In that case you’d need to conditionally swap the container identifier per build configuration.
You might also want a fully separate explicit container if you’re doing destructive testing (bulk-deleting records, resetting the container), testing CloudKit schema changes in isolation before promoting to production, or working on a team where multiple developers need fully isolated data sets.
For most indie developers, the default container separation you get from a different bundle ID, combined with the built-in Development/Production environment split, is more than enough. A fully separate explicit container adds overhead: two containers to manage in the CloudKit dashboard, separate entitlements per build config, and potential signing complications. Only go down that road if you have a specific reason to.
Conclusion
And there you have it, an easy way to take advantage of the built in architecture Apple provides, so that you have a clear separation between PROD and DEV.
Thanks for reading! Feel free to reach out if you have questions, working with Xcode build configs can be a bit arcane at times.
Gavin