Setting up a Dev Environment in Xcode
6 min read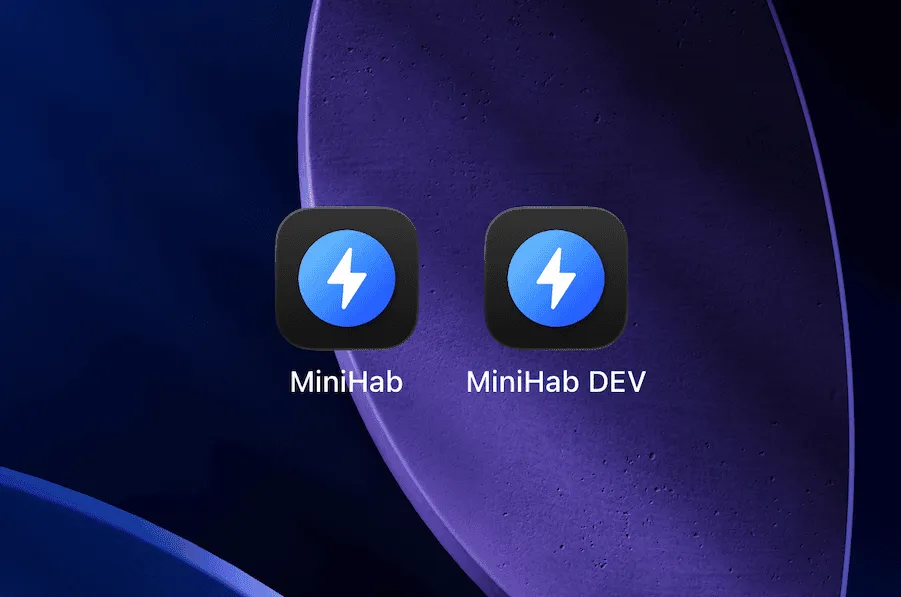
Note: If you want to view the images in this post in their original resolution, you can click on them.
The Problem
If you’re an iOS developer working on an app that uses SwiftData or CoreData with CloudKit, you should know that CloudKit containers have two separate environments: Development and Production. Xcode-installed builds (signed with a development profile) sync against the Development environment, while TestFlight and App Store builds sync against Production.
These environments have completely separate data. The problem arises when you install the app from Xcode (overwriting the PROD copy of the app you already had installed). The local data from Production is still on disk, but CloudKit now pulls the Development data down, and merges the two locally. This doesn’t break anything in PROD, but your local copy of the app now has merged data (Production data remains untouched, but the local data gets mixed).
The Goal
After following this tutorial you will have two schemes: PROD (the default) and DEV (a separate bundle ID). Because the bundle IDs are different, Xcode installs the DEV build as its own app, your App Store install is never overwritten, and each app lives in its own sandbox with its own keychain, UserDefaults, and local database.
The Solution & How to Implement It
Alright before we begin, what we are going to do here is set up a separate build configuration with a different bundle ID. I will break this down into easy to follow tasks that you can do in order.
Step 1: Create a New Build Configuration
- Open your project in Xcode (click the project in the navigator, not a target)
- Select the Info tab
- Under Configurations, click the + button
- Choose Duplicate “Debug”
- Name it
Debug-Dev

Step 2: Set a Different Bundle ID for the DEV Config
- Select your main app target → Build Settings tab
- Search for
Product Bundle Identifier - Expand the disclosure triangle to see per-configuration values
- Change the Debug-Dev row to your bundle ID with a
.devsuffix (e.g.,com.yourteam.YourApp.dev) - Leave Debug and Release unchanged

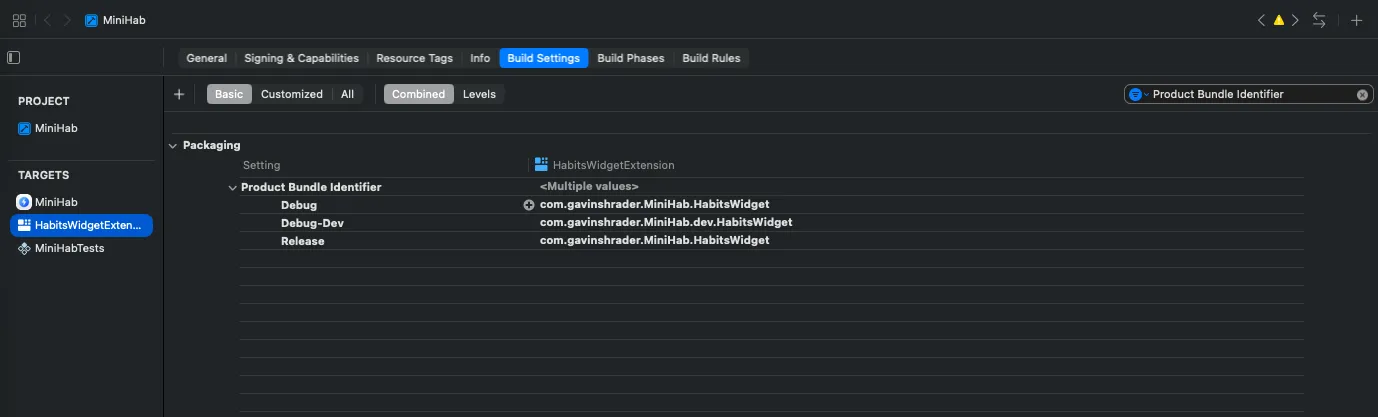
Step 3: Fix Embedded Target Bundle IDs
If you have widget extensions, test targets, or other embedded targets, you need to update their bundle IDs too.
For each embedded target, go to its Build Settings and update the Product Bundle Identifier for the Debug-Dev configuration. The bundle ID must be prefixed with the parent app’s dev bundle ID.
For example, if the parent is com.yourteam.YourApp.dev, the widget must be com.yourteam.YourApp.dev.WidgetExtension — not com.yourteam.YourApp.WidgetExtension.dev.
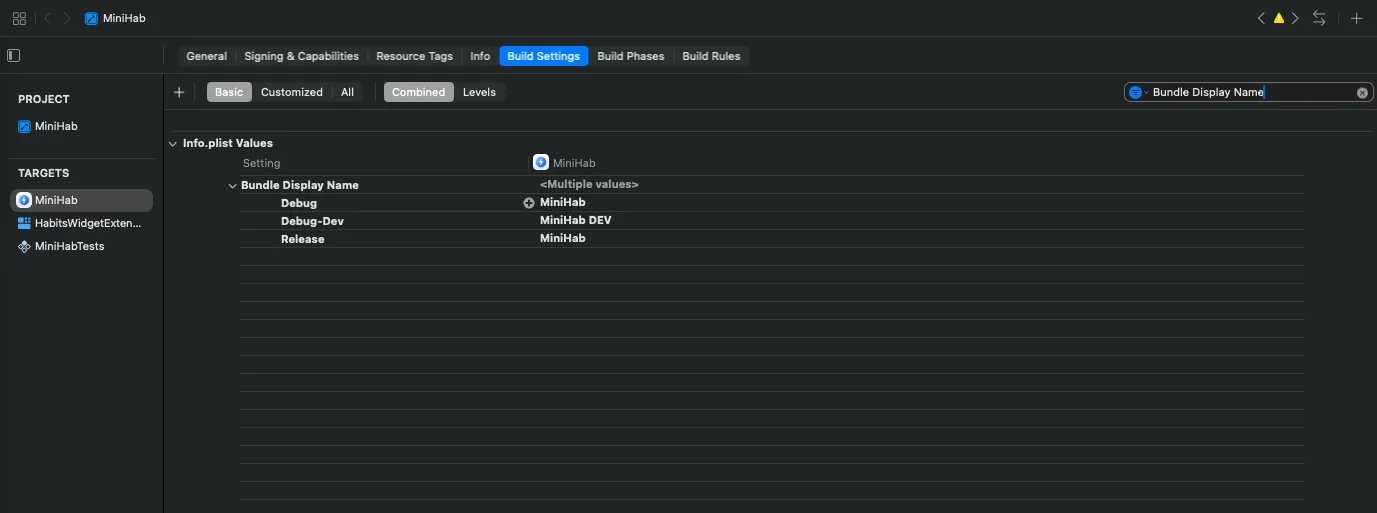
Step 4: Set a Different Display Name
- Still in the main app target’s Build Settings
- Search for
Bundle Display Name(orINFOPLIST_KEY_CFBundleDisplayName) - Set the Debug-Dev row to something like
YourApp DEV
This is the name that appears under the app icon on your home screen.
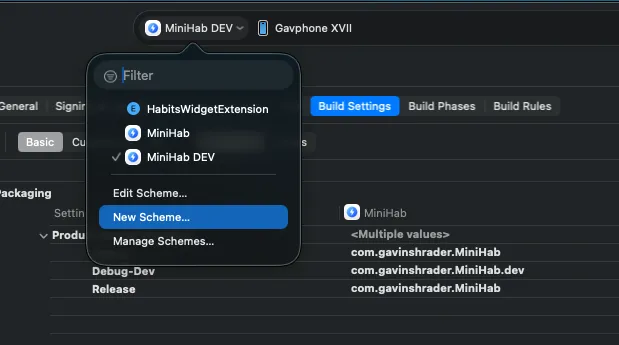
Step 5: Create a New Scheme
- Go to Product → Scheme → New Scheme (or click the scheme picker at the top center of Xcode)
- Name it
YourApp DEV
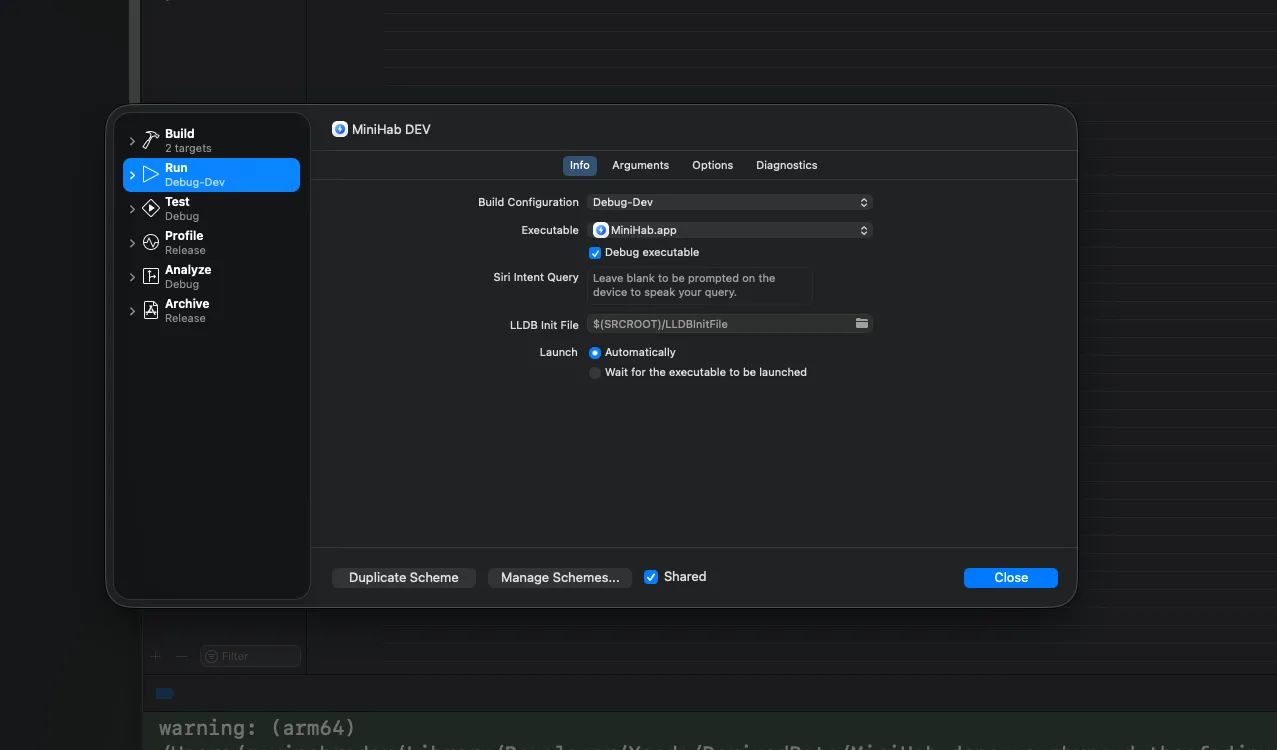
- Click Edit Scheme (or Product → Scheme → Edit Scheme)
- Under the Run action, change Build Configuration to
Debug-Dev - Leave Archive and Profile on Release, you’ll never ship from this scheme, but it keeps things clean
Step 6: Build and Install
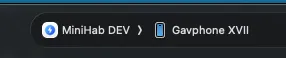
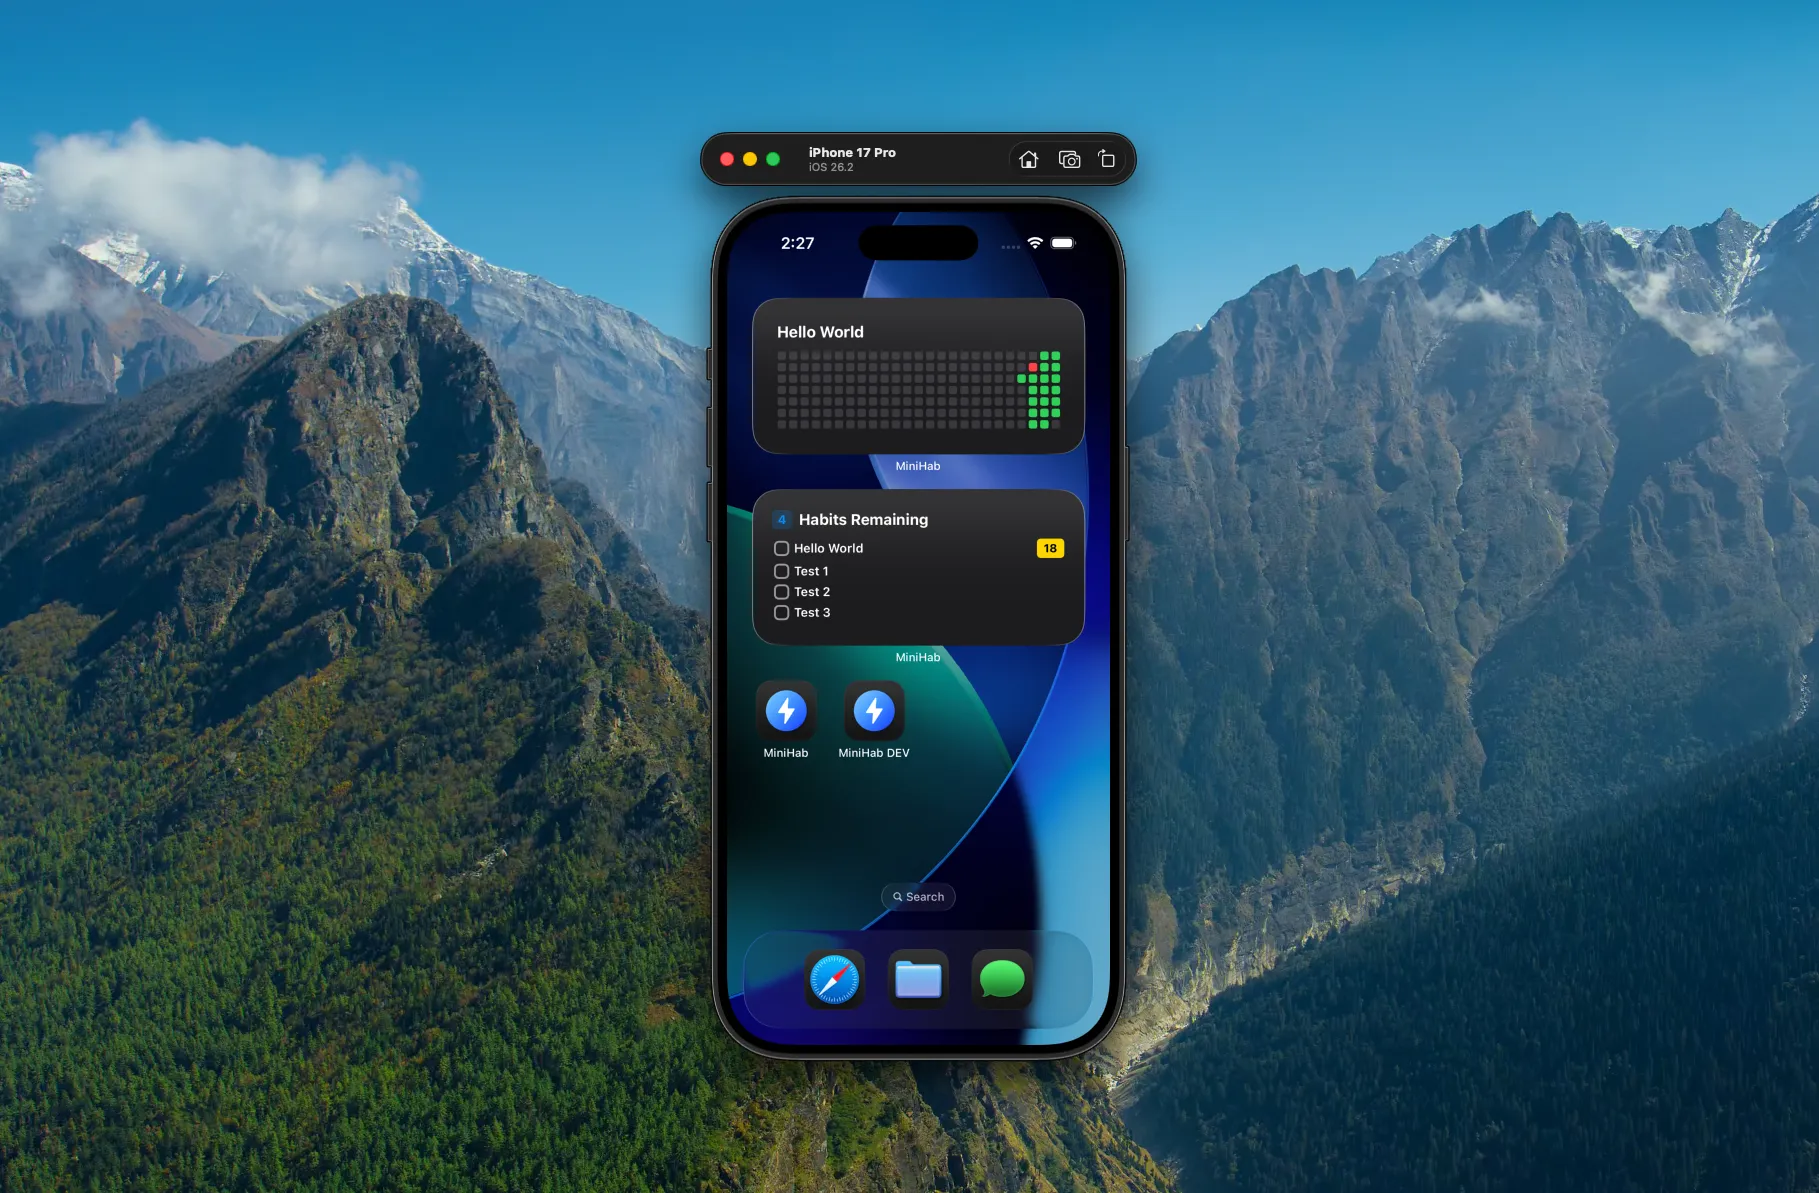
- Select your new DEV scheme from the scheme picker
- Run on your device
- Xcode will auto-create the new App ID and provisioning profile (if you have Automatic Signing enabled)
- Both apps now appear on your home screen
Step 7 (Optional): Add a DEV App Icon
- Create a second app icon set in your asset catalog with a visual indicator (colored banner, “DEV” text overlay, etc.)
- In Build Settings, search for
App Iconand set the Debug-Dev config to your dev icon set - This is an optional enhancement, for this demo I kept the same icons
How Shipping Works
When you’re ready to publish, select your original scheme (not the DEV one), archive, and submit. The DEV configuration is never involved in your release pipeline. Both schemes build the exact same source code, the only difference is the bundle ID and display name.
What You Get for Free
Because the bundle ID is different, iOS treats the dev build as a completely separate app. Your App Store install is never overwritten, and each app lives in its own sandbox with a separate keychain, separate UserDefaults, and separate local database. There is no way for the two installs to merge data on disk.
On top of that, Xcode-installed builds sync against CloudKit’s Development environment while App Store builds sync against Production. Even though both apps share the same CloudKit container (the entitlements file doesn’t change per build configuration), the environment separation means they never see each other’s cloud data.
Important: Always use the DEV scheme when running from Xcode. If you accidentally run the PROD scheme from Xcode, it overwrites your App Store install. The local database persists but CloudKit switches from the Production to the Development environment, causing a “Change Token Expired” error and potentially merging data from both environments. If this happens, delete the app and re-download from TestFlight or the App Store to restore a clean state.
One Caveat
If your app uses App Groups (e.g., for widget data sharing), the dev build still references the same App Group. Widgets will install but will show prod data, not dev data. If you plan on actively developing widgets and are updating their logic often, you should setup a new App Group specifically for your DEV environment.
What About the CloudKit Container?
By default, both your PROD and DEV builds share the same CloudKit container. When you enable CloudKit, Xcode writes a hardcoded container identifier (e.g., iCloud.com.yourteam.YourApp) into your entitlements file, and that file is shared across all build configurations. Changing the bundle ID doesn’t change the container.
This is fine. You don’t need separate containers for this setup to work. The data separation comes from two layers:
- Separate app sandboxes — different bundle IDs mean completely separate local databases on disk. No merging is possible.
- Separate CloudKit environments — Xcode builds hit Development, App Store builds hit Production. It’s the same CloudKit container but with different environments/databases.
If You Need Separate Containers
If you do want a fully separate container for your DEV build, you could conditionally swap the container identifier based on the bundle ID:
import CloudKit

extension CKContainer {
    static var app: CKContainer {
        let isDev = Bundle.main.bundleIdentifier?.hasSuffix(".dev") == true
        let id = isDev ? "iCloud.com.yourteam.YourApp.dev" : "iCloud.com.yourteam.YourApp"
        return CKContainer(identifier: id)
    }
}
You’d also need to add both container identifiers to your entitlements file so the app is provisioned to access either one.
The main reason to do this is if you’re actively iterating on your data model such as adding entities, renaming fields, and experimenting with migrations, those changes get pushed to the Development environment. A truly separate container which exists only for your DEV scheme gives you a place to rapidly iterate. It becomes a throwaway sandbox where you can do rapid model iteration while keeping your primary container clean for Dev—>Prod schema promotions. For most use cases though, this adds overhead without meaningful benefit, and you can easily add this later (as displayed in the Swift code above) if you find your DEV scheme would benefit from a 100% separate container.
Conclusion
And there you have it, an easy way to take advantage of the built in architecture Apple provides, so that you have a clear separation between PROD and DEV.